
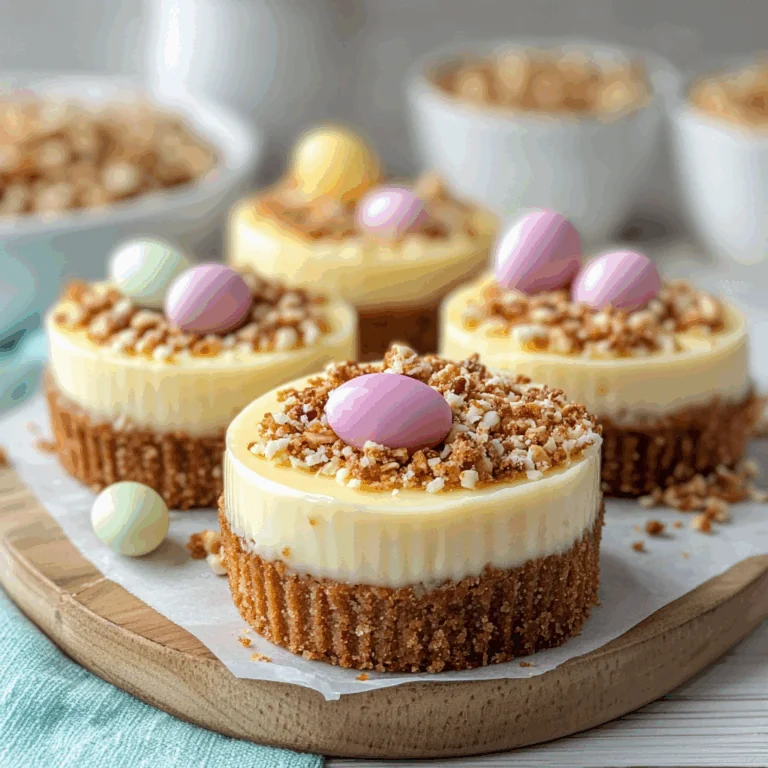
Here you are, ready to embark on a delightful journey with the No Bake Mini Egg Cheesecake! Picture this: creamy, dreamy cheesecake cradled in a buttery biscuit base, topped with colorful mini chocolate eggs that make your taste buds do a happy dance. With each bite, you’re treated to a symphony of flavors—rich, sweet, and just a tad crunchy from those adorable eggs. This dessert is perfect for any occasion, whether it’s a spring picnic or simply an excuse to indulge after a long week.
Now, let me take you back to my childhood when my mom whipped up her famous cheesecake for family gatherings. The aroma wafting through the house was enough to bring everyone running! Fast forward to today, and I’m thrilled to share my own version of this classic treat that’s not only easy to make but also brings a smile to everyone’s face. Trust me; once you try this No Bake Mini Egg Cheesecake, it will become your go-to dessert for every celebration.
Why You'll Love This Recipe
- This No Bake Mini Egg Cheesecake is incredibly easy to prepare; no baking required means less fuss and more fun.
- Its creamy texture combined with the crunch of mini eggs creates an explosion of flavor in every bite.
- Visually stunning with vibrant colors from the mini eggs, it adds charm to any dessert table.
- Versatile enough for birthdays or casual get-togethers, it’s sure to impress family and friends alike.
Ingredients for No Bake Mini Egg Cheesecake
Here’s what you’ll need to make this delicious dish:
- Crushed Digestive Biscuits: These provide a lovely buttery base that complements the creamy filling wonderfully.
- Unsalted Butter: Melted butter helps bind the biscuit crumbs together for that perfect crust.
- Cream Cheese: Use softened cream cheese for a smooth texture that makes your cheesecake rich and irresistible.
- Powdered Sugar: This sweet ingredient balances out the tanginess of the cream cheese beautifully.
- Vanilla Extract: A splash of pure vanilla enhances the overall flavor profile of your cheesecake.
- Heavy Whipping Cream: Whipped cream adds lightness and fluffiness to your cheesecake filling.
- Mini Chocolate Eggs: These delightful treats add color and crunch on top of your cheesecake.
The full ingredients list, including measurements, is provided in the recipe card directly below.

How to Make No Bake Mini Egg Cheesecake
Follow these simple steps to prepare this delicious dish:
Step 1: Prepare the Crust
Start by crushing digestive biscuits into fine crumbs using a food processor or by placing them in a zip-top bag and pounding them with a rolling pin. In a bowl, mix the crushed biscuits with melted unsalted butter until well combined. Press this mixture firmly into the bottom of a greased pie dish or individual ramekins for mini cheesecakes.
Step 2: Make the Cheesecake Filling
In another large mixing bowl, beat softened cream cheese with an electric mixer until smooth and creamy. Gradually add powdered sugar and continue mixing until fully incorporated. Don’t be afraid to taste-test; we all know quality control is important!
Step 3: Add Vanilla
Pour in vanilla extract while mixing at low speed until everything is blended together smoothly. Your kitchen should now smell like heaven!
Step 4: Whip the Cream
In a separate bowl, whip heavy cream using clean beaters until stiff peaks form. Gently fold this fluffy mixture into the cream cheese mixture using a spatula—this step is where magic happens!
Step 5: Assemble Your Cheesecakes
Spoon your creamy filling over the prepared crusts in your pie dish or ramekins. Smooth out the tops with an offset spatula if you’re feeling fancy.
Step 6: Chill
Cover your cheesecakes with plastic wrap and refrigerate for at least four hours or overnight if you can resist! Once set, decorate with mini chocolate eggs for that final touch of sweetness.
Transfer to plates and serve chilled for an unforgettable dessert experience that’s sure to leave everyone asking for seconds!
You Must Know
- This delightful No Bake Mini Egg Cheesecake is not just a treat for your taste buds; it’s a showstopper that demands attention at any gathering.
- The creamy texture and vibrant colors of mini eggs make it perfect for celebrations or just indulging yourself.
Perfecting the Cooking Process
Start by preparing the crust first, allowing it to chill while you whip up the creamy cheesecake filling. This sequence ensures each layer sets perfectly and enhances the overall flavor.
Add Your Touch
Feel free to swap out mini eggs for seasonal candies or sprinkle in some crushed cookies for added crunch. You can also experiment with different flavored gelatins or extracts to customize your cheesecake experience.
Storing & Reheating
Store leftover mini cheesecakes in an airtight container in the refrigerator for up to three days. Refrain from freezing, as the texture may suffer, but they are ready to enjoy straight from the fridge!
Chef's Helpful Tips
- To achieve a perfectly smooth cheesecake, ensure all ingredients are at room temperature before mixing.
- Avoid overmixing to keep the filling light and fluffy.
- Lastly, chilling the cheesecake overnight elevates its flavor and texture, making it truly irresistible.
Sharing my first attempt at this No Bake Mini Egg Cheesecake reminds me of my friend’s wide-eyed amazement when I served it at her birthday party. It was a hit!
FAQs:
What ingredients are needed for No Bake Mini Egg Cheesecake?
To prepare No Bake Mini Egg Cheesecake, you will need cream cheese, sugar, vanilla extract, heavy whipping cream, and mini eggs for decoration. For the crust, use digestive biscuits or graham crackers along with unsalted butter. If you prefer a healthier alternative, consider using oats mixed with almond butter instead of the traditional crust. Remember to avoid any pork products or alcohol in your ingredients.
How long does it take to set the No Bake Mini Egg Cheesecake?
The setting time for No Bake Mini Egg Cheesecake typically ranges from four to six hours in the refrigerator. If you want it to firm up more quickly, consider placing it in the freezer for about one hour. However, make sure to check on it regularly to prevent it from becoming too hard. The cheesecake should be firm yet creamy when ready to serve.
Can I use fruit juices as a substitute for any ingredients?
Yes, you can use fruit juices as a substitute in various parts of your No Bake Mini Egg Cheesecake recipe. For example, if you want to add flavor or moisture, consider incorporating lemon juice into the cream cheese mixture. Additionally, using a fruit juice-based syrup can enhance the taste and presentation of your dessert without any alcohol content.
How can I make this cheesecake vegan-friendly?
To create a vegan version of No Bake Mini Egg Cheesecake, replace cream cheese with a plant-based alternative made from cashews or tofu. Use coconut cream instead of heavy whipping cream for that rich texture. For the crust, ensure your biscuits are cruelty-free or make your own using dates and nuts. This way, you can enjoy a delicious cheesecake without any animal-derived products.
Conclusion for No Bake Mini Egg Cheesecake:
In summary, No Bake Mini Egg Cheesecake is a delightful treat that combines creamy textures with playful decorations. With simple ingredients like cream cheese and digestive biscuits, this dessert is easy to prepare and requires no baking. Allowing it to set properly ensures a perfect balance between flavor and consistency. Experiment with different crust options and flavor enhancements to personalize your cheesecake experience while keeping it enjoyable and accessible for everyone!
No Bake Mini Egg Cheesecake
Indulge in the creamy bliss of No Bake Mini Egg Cheesecake, a delightful dessert that requires no baking! This treat features a buttery biscuit crust topped with a velvety cheesecake filling and colorful mini chocolate eggs. Perfect for spring celebrations or any occasion, each bite promises a delightful mix of textures and flavors that will leave everyone wanting more.
- Total Time: 0 hours
- Yield: Serves 8
Ingredients
- 1 cup crushed digestive biscuits
- 4 tbsp unsalted butter, melted
- 8 oz cream cheese, softened
- 1 cup powdered sugar
- 1 tsp vanilla extract
- 1 cup heavy whipping cream
- 1 cup mini chocolate eggs (for topping)
Instructions
- Prepare the crust: In a bowl, combine crushed biscuits and melted butter. Press firmly into the bottom of a greased pie dish or ramekins.
- Make the filling: Beat cream cheese until smooth. Gradually add powdered sugar and mix well. Incorporate vanilla extract.
- Whip the cream: In a separate bowl, whip heavy cream until stiff peaks form. Gently fold into the cream cheese mixture.
- Assemble: Spoon the filling over the crusts and smooth the tops. Chill for at least 4 hours or overnight.
- Decorate: Before serving, top with mini chocolate eggs.
- Prep Time: 20 minutes
- Cook Time: None
- Category: Dessert
- Method: No Bake
- Cuisine: American
Nutrition
- Serving Size: 1 slice (100g)
- Calories: 400
- Sugar: 30g
- Sodium: 150mg
- Fat: 28g
- Saturated Fat: 16g
- Unsaturated Fat: 10g
- Trans Fat: 0g
- Carbohydrates: 32g
- Fiber: 1g
- Protein: 4g
- Cholesterol: 80mg